Last Updated: August 14, 2016 19:52
This page provides a set of instructions to optimize hardware/software configurations for using with Diapente Audio Stream Player.
Diapente Audio Stream Player is a streaming only player, thus it requires music servers (DAAP) to access music. It does NOT play music stored on your device.
Here is the quick run down of steps needed to stream your music on your local network.
And additional steps needed to stream your music over the Internet from your home server. But before you attempt to configure the router, please make sure that you are able to connect to your music server in your home WIFI first.
To help you get started even faster, you may follow steps in one of these vendor specific guides.
The Firefly Media Server is an Open Source server program capable of serving your music files to compatible clients on your home network, such as Diapente Audio Stream Player.
Latest Firefly Media Server is available at our website. It may be downloaded from Resources or click here: Firefly Media Server build 1737.
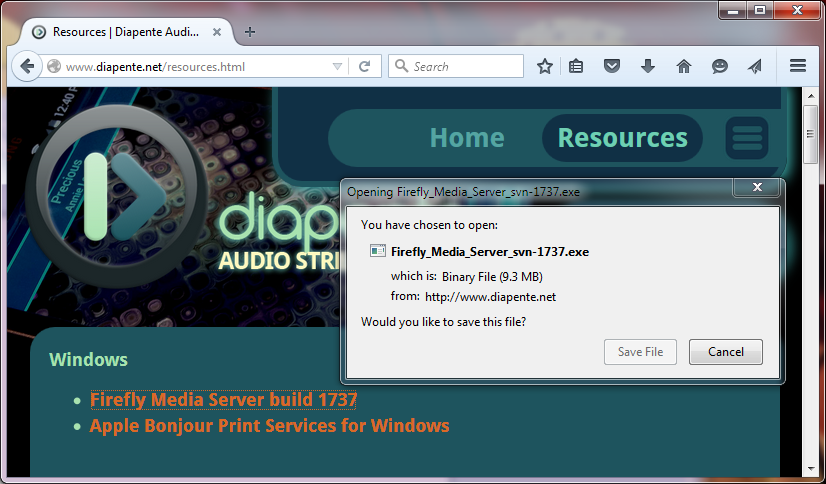
Once downloaded, launch the installer from where it was downloaded or from within the browser as shown here.

You may get a UAC prompt, such as one shown here. Please click 'Yes' to confirm the dialog box.
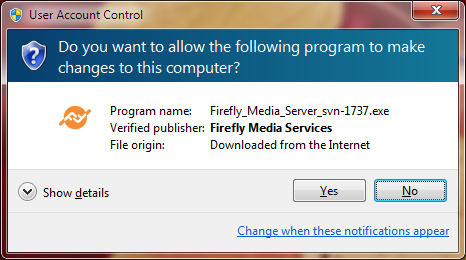
Next, choose your language.
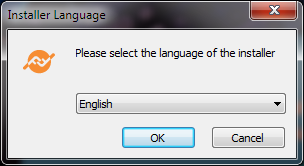
You will be greeted with the installation welcome dialog. Click 'Next' to proceed.

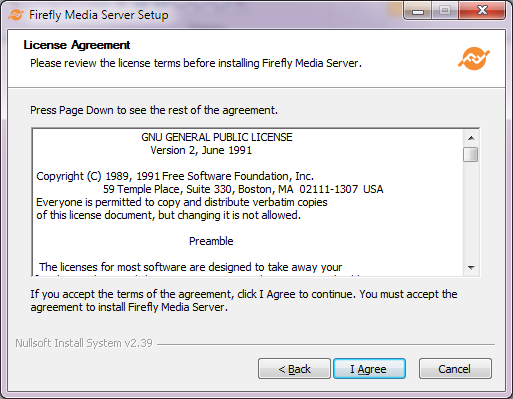
License agreement is presented. Please click 'I Agree' to proceed.
You must choose the install location. The default location is suitable for most cases. Please click 'Next' after you've made your selection.

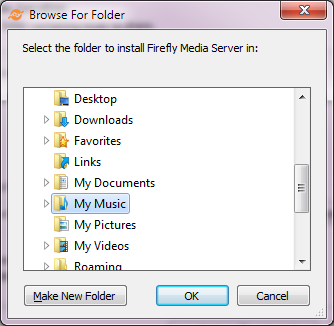
This next step is important for Windows Vista/7+ users. The default selection DOES NOT correctly reflect your actual Music folder. So you MUST use the 'Browse' option if you are on Windows Vista/7+.
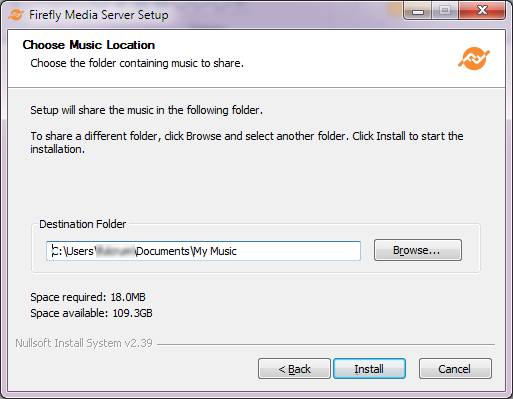
Browse to 'My Music' or any other music folder. Note that you may add additional folders later using browser based configuration app.
Once installation has finished, find the Firefly Media Server tray icon in System Tray and right click to open the configuration dialog.

First, you should check 'Protect Firefly media library with a password' and type in your password.
If you are going to share your music with others, then changing your 'Library Name' is highly recommended. Change the 'Library Name' to be more distinct, e.g. "Bob's Cool Music." or "Jane's Eclectic Collection"

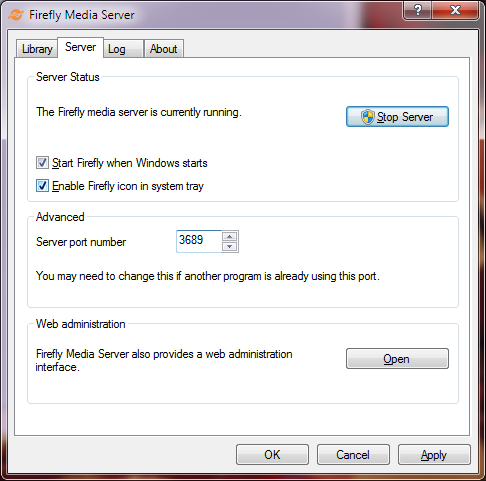
Click on the 'Server' tab on the top row to access server configuration.
Standard DAAP port number is 3689. Firefly Media Server defaults to 9999 but you may change it on this screen.
You may access the web administration app from here. After the admin app is opened, you may add to your bookmarks for future access.
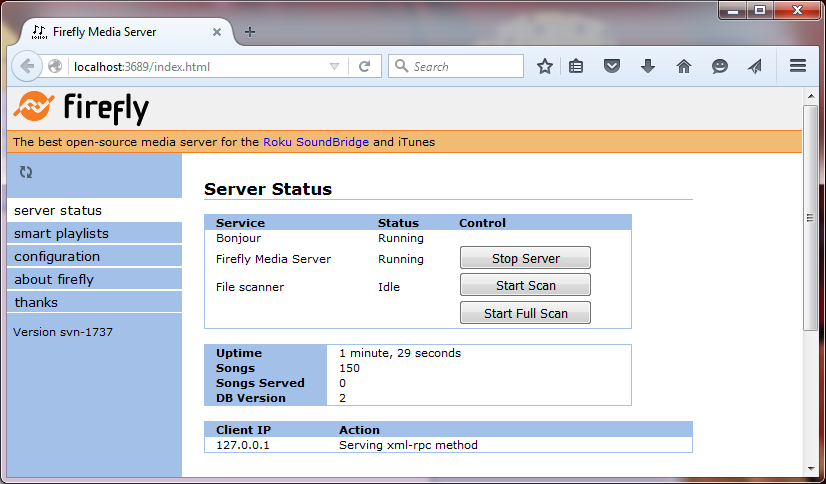
The Server Status is the main screen of Firefly Media Player configuration app.
'Start Scan' button is used for scanning changes to the existing collection while 'Start Full Scan' will completely erase the database and rebuild.
Note, whenever you use the 'Start Full Scan' button you must also reload the corresponding catalog in Diapente Audio Stream Player since all the index would have changed.
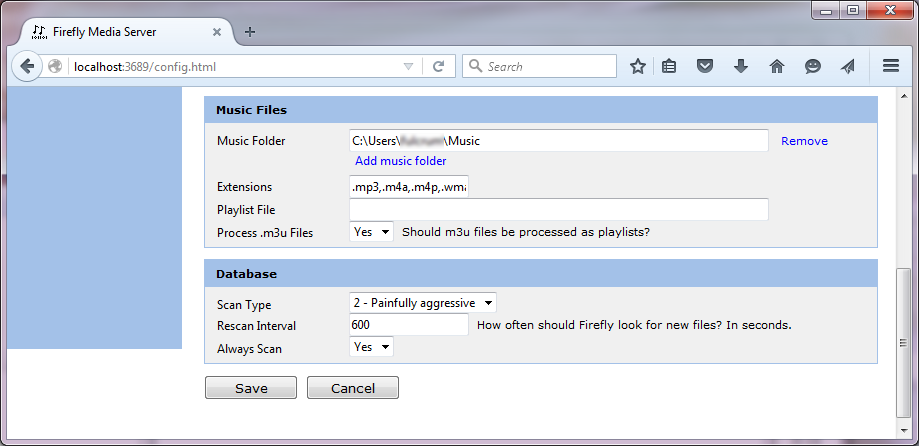
'Start Scan' will also process playlists in your defined music folders, if 'Process .m3u Files' setting is enabled under Configuration page.
Optionally, you may add additional music folders in Configuration page.
Click on 'Add music folder' link, then fill the full path of your desired folder and hit 'Save' to complete it.
Unfortunately, folder browsing is not available on this setting. Please see next step on how to get the full path of your music folder.
In order to ascertain the full path of your music folder, navigate Explorer to your desired folder then click on the empty area right side of the folder name as indicated by green highlight box.
Once the full path is revealed, simply copy and paste in the configuration setting.

Firefly Media Server can process .m3u and .pls playlist files residing anywhere in your music folder/folders. You may create playlist files with any music player but they must be saved in .m3u or .pls format.
For example, using Windows Media Player, you must use the 'Save list as...' option and then changing the file type to .m3u as shown here.
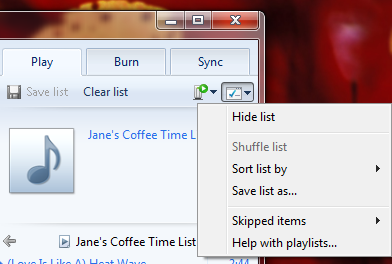
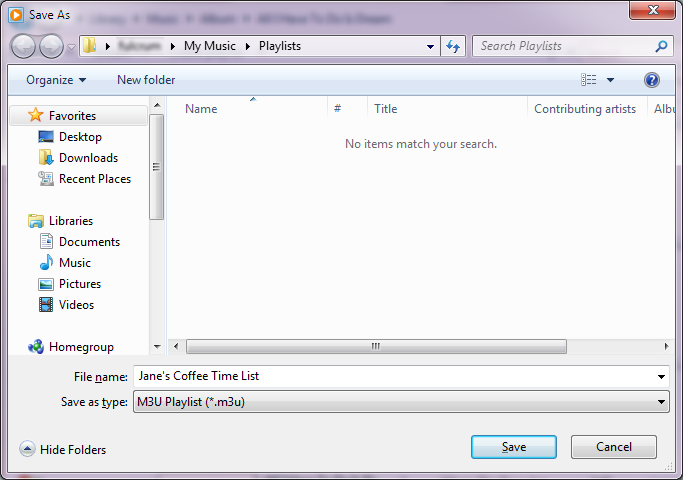
Your playlists will be scanned automatically within the Rescan Interval in Configuration page. Alternatively, if you wish to scan immediately you may click on the 'Start Scan' button on the Server Status page.

In order to help Diapente Audio Stream Player to find compilation album covers better, you may wish to designate compilation folder name or names.
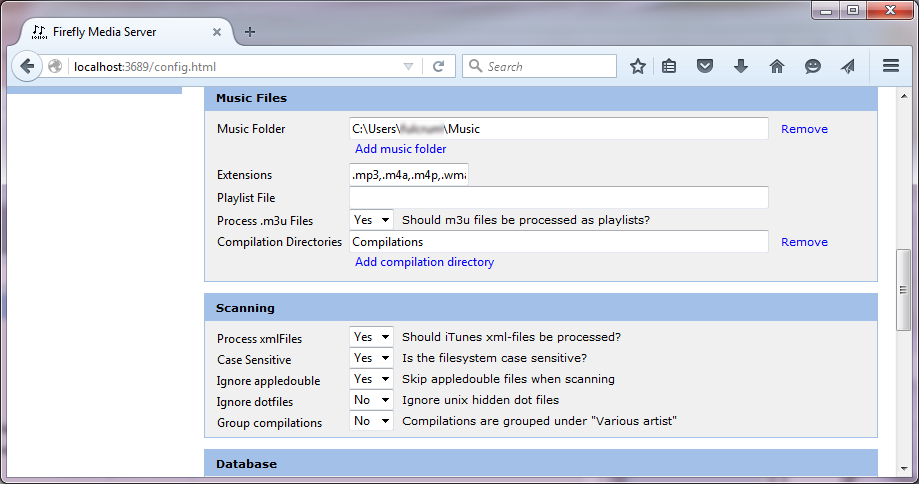
Start by opening the Configuration page then click on 'Show advanced config' link. And then in 'Music Files' section fill in the desired folder name. Click 'Save' button at the bottom of the page to complete it.
In this example, it is 'Compilations.' In order for this setting to take effect, you must create a folder in your music folder named 'Compilations' and place all of your compilation music files in that folder.
Note that if you change this setting with existing collection, you must use the 'Start Full Scan' button on the Server Status page.
Lastly, 'Group compilations' setting under 'Scanning' section is 'No' by default and should NOT be changed.

At home, typically there is a device called 'router' that connects your wired and wireless devices to cable modem, which in turn connects to the rest of the Internet.
By default, the router prevents devices outside of your home to access resources in your local network. If you wish to access your music when you're away from home, then the router needs to be configured to allow Diapente to reach your home music server through Internet.
Optionally, Dynamic DNS service may be employed for easy access to your home Internet address. There are many free Dynamic DNS providers that are available for you to use.
Static IP for server machine is important for proper operation as clients need static or unchanging address to be able to connect to it on a consistent basis. And your music server is no different.
Static IP may be achieved in a couple of different ways. First way is by assigning a static IP directly on the server outside of the router's DHCP address pool. And the other way is to reserve an IP address on the router's DHCP address pool for your music server.
Preferred method is DHCP IP lease reservation, please refer to your router's manual.
Information on assigning static IP directly is available widely on the Internet, such as this helpful article.
Port forwarding allows traffic received by the router on a designated port to be routed to another device within your local network. You'll need this functionality to enable Diapente to reach your music server when you're away from home.
However, we cannot provide specific instruction here because the procedure and terminology varies with different model and make of routers.
Please refer to your router's manual on how to achieve this. Also, there is plenty of information available on the Internet regarding this topic. Simply google the phrase 'port forwarding [model number]' where 'model number' is your actual model number of your router.
Here is a helpful site with loads of information on port forwarding by manufacturer and model number: setuprouter.com.
Be wary of advertisements of software packages to achieve this simple function, you don't need to spend a single penny if you don't want to.
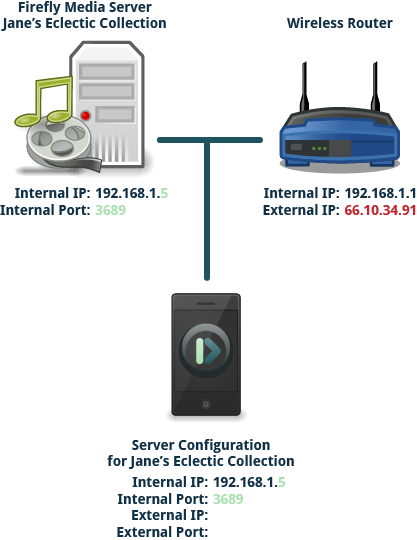
Illustration of typical local network just after installation of Firefly Media Server.
In this example, the server has an internal IP address of 192.168.1.5 and port 3689. The IP address should be static, if not please refer to Static IP section for details.
Diapente may connect to the server immediately without any intervening steps.
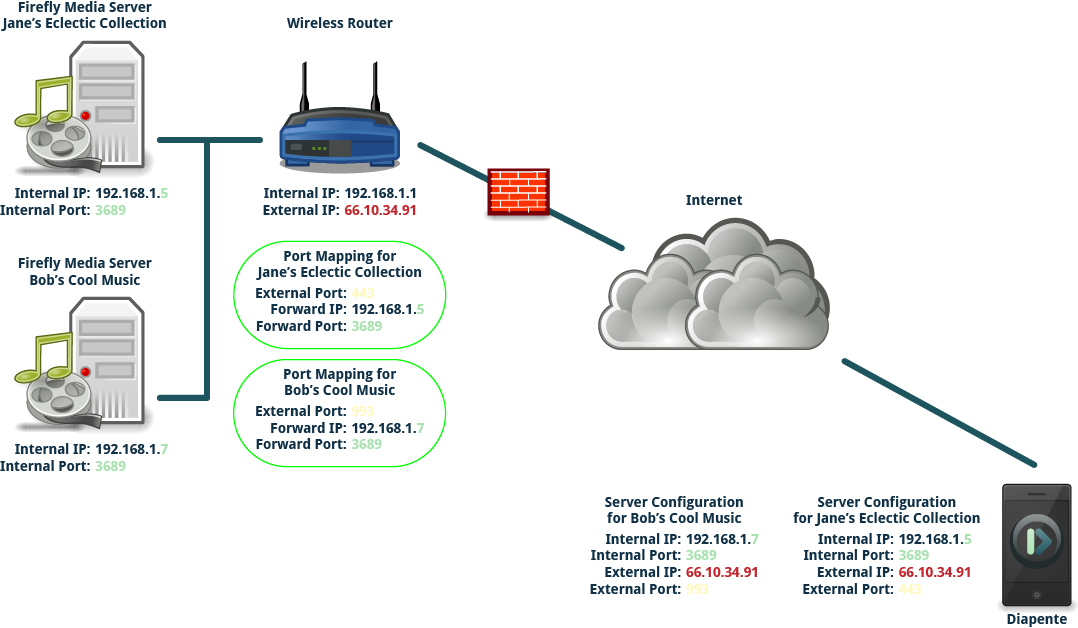
Diapente cannot access your music server from outside your local network because it's behind the router's firewall. The router needs to be configured to access resources behind its firewall.

On the router, port 443 is mapped to internal host 192.168.1.5 port 3689. So, whenever traffic is received on the router's port 443 from the Internet, it will be routed to the mapped internal host.
Server setting in Diapente should reflect this as well. Fill in the external IP and port number into the corresponding server entry.

In this example, we'll add a second music server located in the same local network.
The second server has an IP address of 192.168.1.7 port 3689.
Note, however that external port 443 is already mapped to an existing host, the .5 host. Therefore, we must map another port number to the .7 host. In this example, we will use port 993 to be mapped to 192.168.1.7:3689.
Some ISPs may assign a different external IP address to your router between resets or even periodically. When this happens, you and all your users will need to change the IP address in Diapente, which is decidedly inconvenient. Dynamic DNS could be used in those cases to give your router a permanent name even when the numerical address may change at any time.
In this example, the host name for our router is jbm.noip.org. Once we have registered this name with a dynamic DNS provider, just use this name in Diapente's server configuration once never to be changed again.
Please refer to Dynamic DNS section for further detail.

Dynamic DNS will automatically update a named host's IP address in DNS whenever change is detected. This is highly useful when you do not have a public static IP. The host name will always follow the correct IP address regardless of any changes.
Most home routers have dynamic DNS client built-in. However, you will need to sign up with a dynamic DNS provider, often provided at no cost for a single IP. Alternatively, if your router does not offer this functionality or no suitable provider is available for your router, some providers offer client software package to be installed on your server.
After you've signed up, simply input the account information in your router's dynamic DNS setting or client software.
Your ISP may offer dynamic DNS service as part of your package, so it's worth to inquire about it with your ISP.
Here is a partial list of popular free dynamic DNS providers.
If your router is provided by your ISP, then they may be able to assist you with both Port Forwarding and Static IP assignment.
If you need help with Static IP then you may tell the ISP's tech support with this request:
"I'd like to assign static IP on my PC from my router's DHCP server."
If you need help with Port Forwarding, you'll need Firefly Media Server's port number and IP address handy. Once you have those written down, tell the tech support with this request:
"I'd like to configure my router to forward port 443 to my PC's port {Firefly Port Number you've written down}."
And when the tech support asks what is your PC's IP address, tell the tech support the IP address you've written down.
You can now use port 443 as 'Ext Port' in Diapente's server configuration.